React-Admin Exploration
As part of my tech watch I came across React-Admin, a frontend Framework that allows us to build admin applications running in the browser. Here I share with you some basic information about it and a quick getting-started tutorial.
Main information
What is it?
- Front-end framework that uses React, Material UI, React Router, Redux, and React-final-form, using ES6
- Building a unified customizable admin dashboard running in the browser
- Open sourced and maintained Marmelab.
How does it work?
- The admin application communicates with any API in a standardized way through a data provider, whether the API uses REST, GraphQL or anything else.
- Data Provider is an adapter for an API. It acts as the interface between them.
- It takes care of the querying and response handling between both of them.

- You can use React-Admin’s or open-sourced data providers and create your own
Main features
- Build the app in a modular way
- One component maps one API endpoint to a CRUD interface
- Optimistic rendering
- Secure the app with any authentication strategy (Basic Auth, JWT, OAuth, etc.)
- Translation system
- Customization / design using Material UI
Demo
Resources
- Official documentation on React Admin
- Building an admin console in react-admin
- REST data provider used below
Basic Tutorial
Basic Implementation
1. Create a new project
npx create-react-app my_dashboard
2. Install react-admin and your chosen data provider
cd my_dashboard

npm install react-admin ra-data-simple-rest
# ra-data-simple-rest is the data provider

npm start
Start building the app
1. Replace the src/App.js with the following code and add your api.
// App.js
import React from 'react'
import { Admin } from 'react-admin'
import simpleRestProvider from 'ra-data-simple-rest'

const dataProvider =  simpleRestProvider('http://path.to.my.api/')
const App = () => <Admin dataProvider={dataProvider} />

export default App;
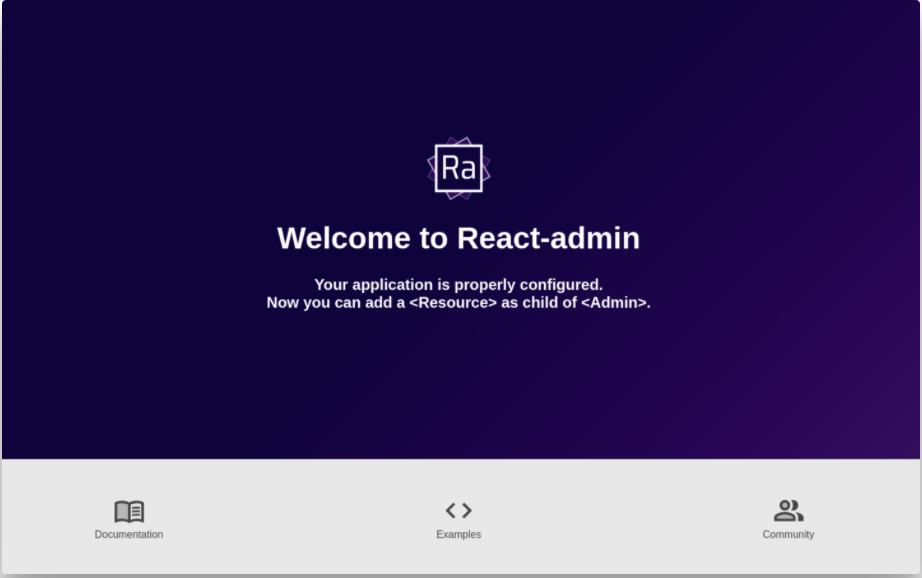
This is enough for React-Admin to work. Your browser should display the following page:

2. Now let’s display the first resource
A <Resource> component maps one API endpoint to a CRUD interface. The data provider will make a request to the API http://path.to.my.api/my_end_point, in the example below the endpoint will be /projects, then display the data using the ListGuesser component.
// App.js
import React from 'react'
import { Admin, Resource } from 'react-admin'
import simpleRestProvider from 'ra-data-simple-rest'

const dataProvider =  simpleRestProvider('http://path.to.my.api/')
const App = () => {
    return (
        <Admin dataProvider={dataProvider}>
            <Resource name="projects" list={ListGuesser}/>
        </Admin>
    )
};

export default App;
3. Create the first component to override the ListGuesser suggestion.
Using the ListGuesser module, the app will generate source code in the console that will help you create and customize the component.
You just need to copy & paste from the console the code and import the fields (List, Datagrid etc.) from `react-admin’
// project.js
import React from 'react'
import { List, Datagrid, TextField } from 'react-admin'

export const ProjectList = props => (
    <List {...props}>
        <Datagrid rowClick="edit">
            <TextField source="id" />
            <TextField source="name" />
            <TextField source="short_description" />
            <TextField source="long_description" />
            <TextField source="url_github_front" />
            <TextField source="url_github_back" />
            <TextField source="url_deployed" />
            <TextField source="thumbnail" />
            <TextField source="techno" />
        </Datagrid>
    </List>
);
You now need to update the fields with more appropriate ones. You also have the possibility to customize them.
import React from 'react'
import { List, Datagrid, TextField, UrlField, EditButton } from 'react-admin'

export const ProjectList = props => (
    <List {...props}>
        <Datagrid rowClick="edit">
            <TextField source="id" />
            <TextField source="name" />
            <TextField source="short_description" />
            <TextField source="long_description" />
            <UrlField source="url_github_front" />
            <UrlField source="url_github_back" />
            <UrlField source="url_deployed" />
            <TextField source="thumbnail" />
            <TextField source="techno" />
            <EditButton />
        </Datagrid>
    </List>
);
4. Now, let’s add an editing feature
As we did to display the data with the ListGuesser module, we can set up the edit feature with the EditGuesser module.
// App.js
import React from 'react'
import { Admin, Resource, EditGuesser } from 'react-admin'
import simpleRestProvider from 'ra-data-simple-rest'
import { ProjectList } from './components/project'

const dataProvider =  simpleRestProvider('http://path.to.my.api/')
const App = () => {
    return (
        <Admin dataProvider={dataProvider}>
            <Resource name='projects' list={ProjectList} edit={EditGuesser} />
        </Admin>
    )
}

export default App;
5. Create our component Project Edit
As you did to list the data with the ProjectList component, copy and paste the generated code from the console and save it in the project folder and start customizing the fields.
// project.js
export const ProjectEdit = props => (
    <Edit {...props}>
        <SimpleForm>
            <TextInput disabled source="id" />
            <TextInput source="name" />
            <TextInput multiline source="short_description" />
            <TextInput multiline source="long_description" />
            <TextInput source="url_github_front" />
            <TextInput source="url_github_back" />
            <TextInput source="url_deployed" />
            <TextInput source="thumbnail" />
            <TextInput source="techno" />
        </SimpleForm>
    </Edit>
);
Don’t forget to update the App.js file with your editing component.
import React from 'react'
import { Admin, Resource } from 'react-admin'
import simpleRestProvider from 'ra-data-simple-rest'
import { ProjectList, ProjectEdit } from './components/project'

const dataProvider =  simpleRestProvider('http://path.to.my.api/')
const App = () => {
    return (
        <Admin dataProvider={dataProvider}>
            <Resource name='projects' list={ProjectList} edit={ProjectEdit} />
        </Admin>
    )
}

export default App;
Please note that by default to edit an item you need to click on the line you wish to edit but you can also enable an edit button by adding a <EditButton /> in the Datagrid of your ProjectList.
To go further, have a look at the official documentation and the tutorial.
Claire

Comments